Impress your clients with modern, stunning, fully customizable website templates • Ad
By default, the Flood Select Tool in Affinity Photo only selects one area at a time.
Since Affinity Photo is quite similar to Photoshop in many aspects, I tried holding down the Shift key to make multiple selections, but it didn’t work. It just cancels the current selection and creates a new one when I’m clicking on another area.
Luckily, the solution was easy and right under my nose. But, of course, I had to find that out after a Google search. 😃
So, I thought that this topic is a good fit for a tutorial, since others might be facing the same issue. Especially those that are transitioning from Photoshop.
Make Multiple Selections with the Flood Select Tool in Affinity Photo
As I previously mentioned, the solution is easy and right under your nose.
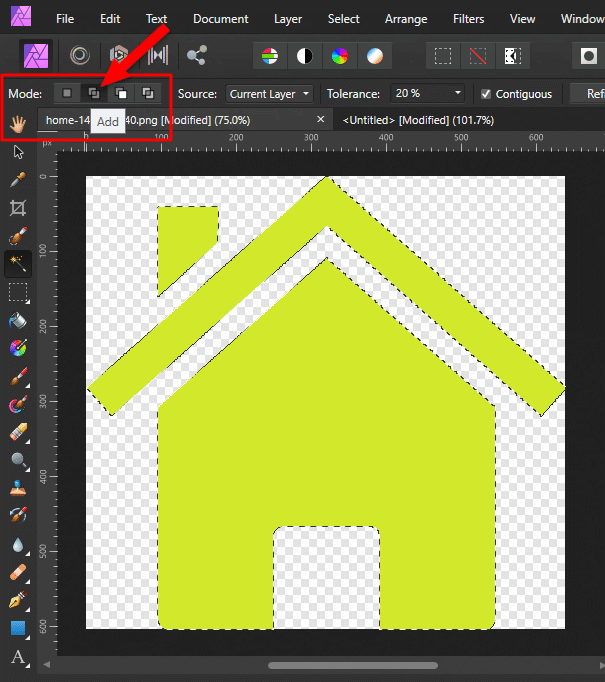
All you have to do is to switch the Mode to Add from the context toolbar. That’s it.
Now, multiple areas will be selected when you click on them. You don’t need to hold down any key or something like that.
Note that I’m using Affinity Photo 1.9.2. It might be different on older versions.
That’s a Wrap
I hope this post has helped you out.
If you're interested in my web design services or free templates, want to collaborate, or just have something to say, feel free to shoot me a message.