Impress your clients with modern, stunning, fully customizable website templates • Ad
Yesterday, I spent all night tweaking my website to make it lighter, improving the loading time.
In the process, I got rid of my WordPress security plugin because, after doing some research and reading several posts, including this one and this one, I convinced myself that they are pretty overrated.
I already knew that they are “heavy” and can drag a WordPress website’s speed down, but I always thought they’re crucial. I never gave it a second thought.
Well, it turns out that there are other, better ways to secure a WordPress site. And I went with those.
If you’re a non-techie, not experienced with WordPress and security, and/or you’re on a crappy shared hosting, then I recommend sticking with a security plugin.
Anyway, there was one thing I still wanted that the security plugin had – to block brute-force attacks by limiting the number of login attempts, even though most bots come packed with thousands of different IPs, and can blast your site all day long.
This happened to me several months ago on one of my websites. A brute-force attack bot was trying over and over again to log in using the “admin” username, which resulted in instant bans.
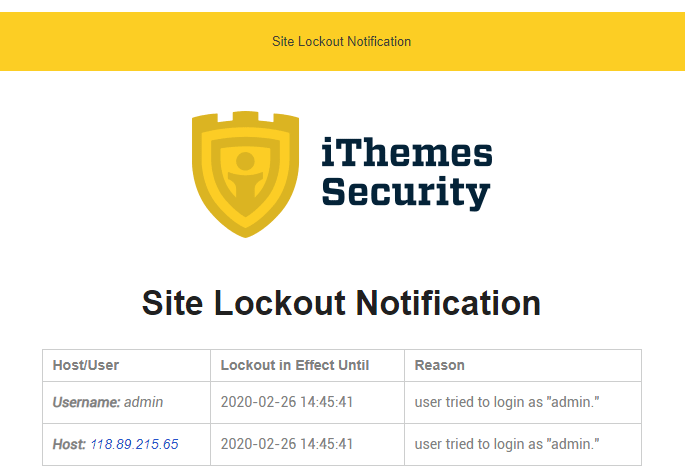
It went on for two days until I disabled the email notification. The last count was 77 at attempts.

This probably wouldn’t have happened if I could have changed the login slug. Unfortunately, I couldn’t do this for that particular website.
Anyway, I digress again. Back to limiting the login attempts.
My first thought was to use the Limit Login Attempts Reloaded plugin. But I really, really didn’t want to, so I dug deeper and found a gem – Cloudflare’s Rate Limiting tool!
How to Use Cloudflare’s Rate Limiting Tool to Block Brute-Force Attacks
Using Cloudflare’s Rate Limiting is dead easy and free-ish!
You get the first 10,000 requests for free. After that, you’ll be charged $0.05 (5 cents) per 10,000 requests.
Note that:
Rate Limiting is billed based on the number of good (not blocked) requests that match your defined rules across all your websites.
They explain the Rate Limiting billing, in detail, here.
Now, here’s what you need to do to block brute-force attacks with Rate Limiting.
Step 1
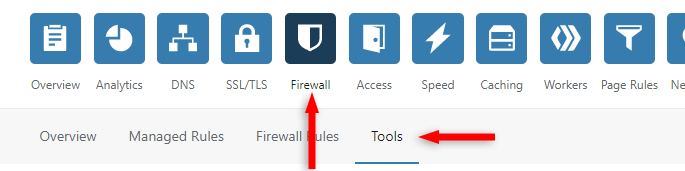
First, make sure you’re adding Rate Limiting to the correct website. Then, go to Firewall > Tools.
Step 2
Scroll to the Rate Limiting section and click on Protect your login.
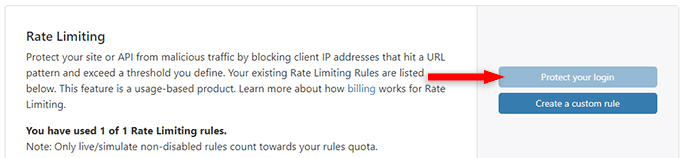
The button in the screenshot is grayed out because I already used the rule. Yours won’t be.
You’ll be prompted to add your payment info after clicking the button.
Remember that you won’t be charged until after the first 10,000 requests, if you ever get there.
Step 3
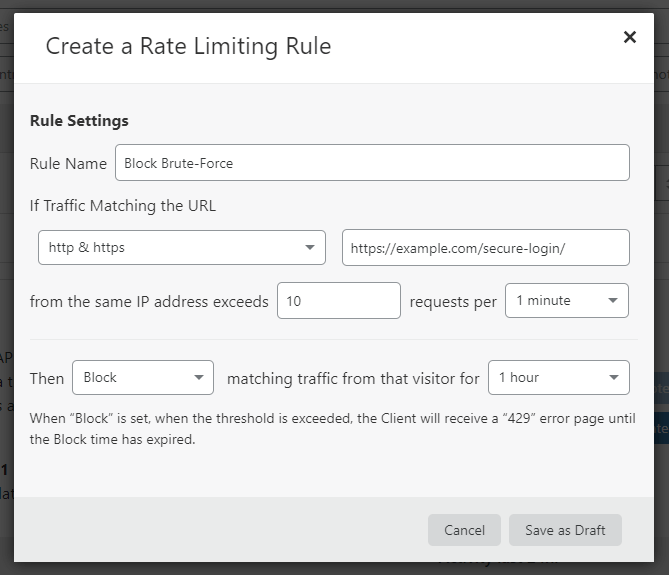
Add whatever name you want for the Rule Name field, then add your login URL (e.g. https://example.com/secure-login/).
If you’re using WordPress, don’t use the default login slugs, such as /wp-admin/! More details why, in the next section.

After you click on Deploy, a rule is set to block the scoundrel for 15 minutes when sending more than 5 (POST) requests within 5 minutes.

Now Cloudflare will handle the brute-force attacks, sending an HTTP 429 (Too Many Attempts) code when the attacker is blocked.
Create a custom rule (optional)
If you want a bit more flexibility, you can create a custom rule instead, where you can select:
- Lower/higher number of requests;
- Requests per 1 minute or 10 seconds;
- A blocking period of 1 minute or 1 hour.
Unfortunately, the options for the custom rule are limited for the Free plan.
Recommendations
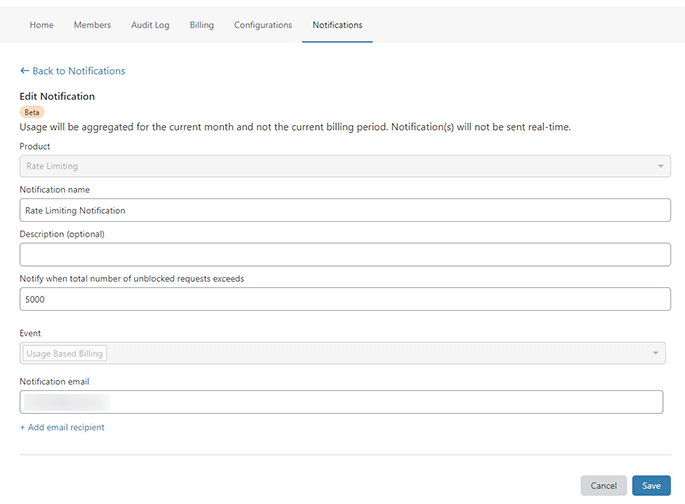
1. Create a Rate Limiting notification
Create a notification in your Cloudflare Account for Rate Limiting, as it’s explained here, so that you can get notified when a certain number of requests are exceeded.
That way, you can get a heads up when you’re getting close to the free 10,000 requests.
2. Avoid using a common login slug, especially if using WordPress
The default login slugs for WordPress are:
- /login/
- /wp-admin/
- /admin/
- /wp-login.php
The first three redirect to the last one: /wp-login.php.
Every hacker knows them, so they will get straight to them, either themselves or through a bot.
So, if you don’t change it, it’s one-shot for them. They can get to work immediately, pounding your login page with login attempts, potentially burning your free 10,000 requests from Cloudflare’s Rate Limiting along the way.
So, for WordPress, if you don’t have a WordPress security plugin that does this, use WPS Hide Login.
This will change your login slug, and the default ones will return a 404 Page Not Found error.
So, if a hacking bot is set to target /wp-admin/, for example, it will bump into a 404 error code, so there’s nothing for it to attack.
The same goes for those not using WordPress. Try not to use common login slugs like /login/, /log-in/, /admin/, etc.
That’s a Wrap
I hope this post has helped you out.
If you're interested in my web design services or free templates, want to collaborate, or just have something to say, feel free to shoot me a message.