Impress your clients with modern, stunning, fully customizable website templates • Ad
Recently, I installed a game called Guild Wars 2.
While I was setting up my key bindings, I noticed that my mouse buttons 5 and 6 didn’t work. They weren’t recognized by the game, so nothing happened when I tried to bind them.
Luckily, someone pointed out the problem in a forum. The problem was that the game’s client wasn’t running as administrator in Windows 10.
Don’t ask me why that happens because I don’t know 😃. I only know that running apps as administrator grants certain privileges, which are required for some functionalities or settings to work.
Now, by default, I always have to right-click on the game’s client to select “Run as administrator”. That isn’t only annoying to do all the time, but I also forget to do it, as I did today.
That got me wondering: “Isn’t there an option to set an app to always run as administrator in Windows 10?”. Fortunately, there is, and I’ll share it with you.
Set Apps to Always Run as Administrator in Windows 10
The solution is quick and easy. Here’s what you need to do.
Step 1
For whatever reason, this only works on shortcuts. If you know a different way, let me know.
If you already have the app’s shortcut on your Desktop, go ahead and right-click on it. Then, select Properties and skip to step 3.
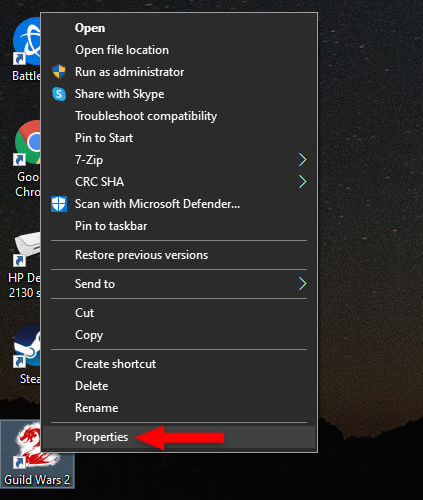
If you don’t have the app’s shortcut on your Desktop, do this:
- Go to your Windows 10 search bar and enter the name of the app;
- It should appear at the top, highlighted in blue, under the Best match section;
- While it’s highlighted, click on Open file location, on the right side.
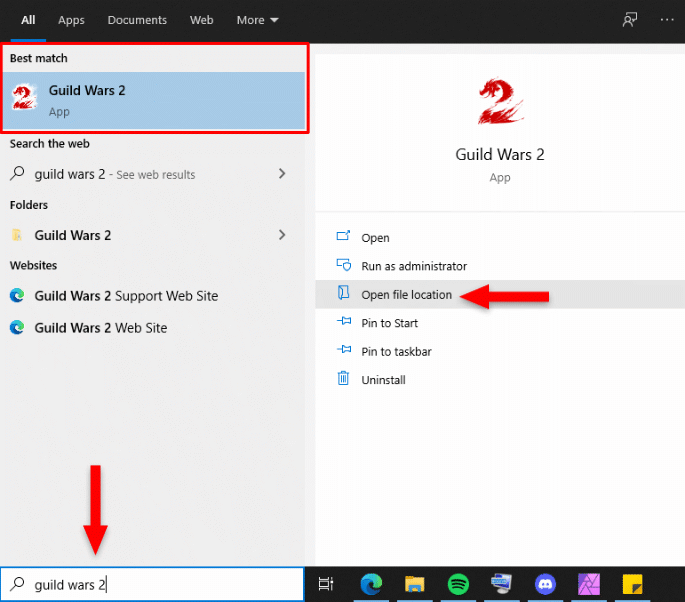
Alternatively, you can right-click on the highlighted app, under Best match, and select Open file location there.
Step 2
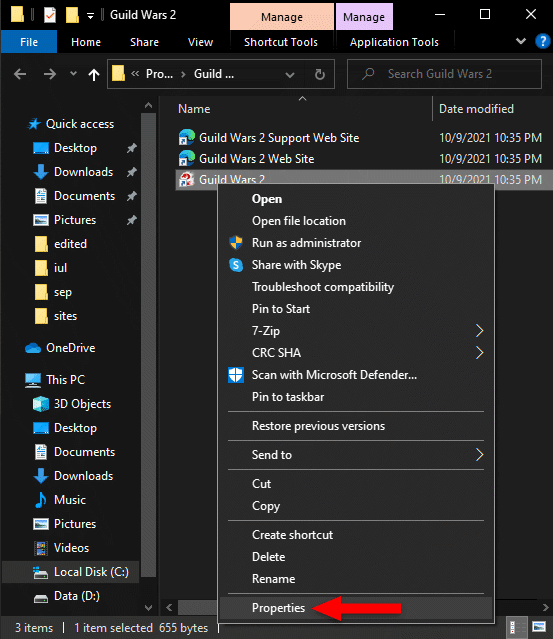
Once Windows 10 has opened the file location, the shortcut will automatically be selected.
Right-click on it and select Properties.
Step 3
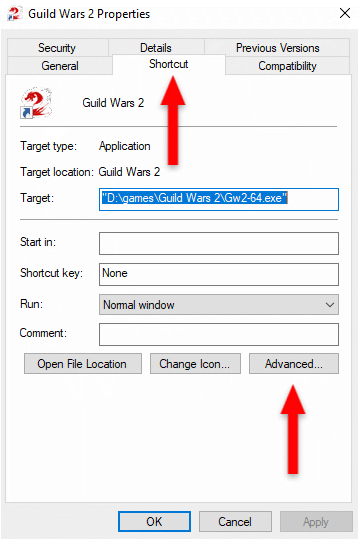
The Shortcut tab should be automatically selected. There, click on the Advanced… button.
Step 4
An Advanced Properties pop-up will appear.
Check the Run as administrator box to always run apps as administrator in Windows 10.
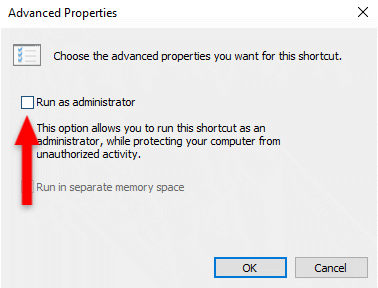
Click the OK button, then the Apply button before closing the Properties panel seen at the previous step.
Now, the app will automatically run as administrator in Windows 10. But remember, it has to be a shortcut.
Note that when running apps as administrator in Windows 10, the User Account Control prompt will appear, asking you if you want to allow the app to run.
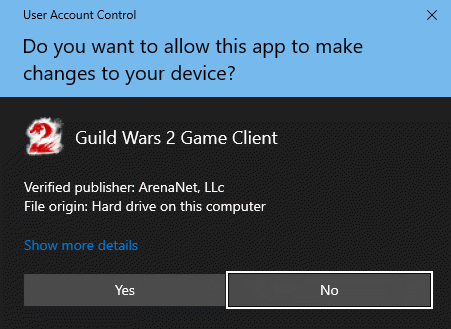
If it’s the app you trust, then click Yes and it will start.
This is a security feature, and while it can be annoying, I don’t recommend deactivating it. It’s another layer of protection against malicious software that wants to run on your computer.
So, I also recommend reading the prompt to see if you recognize the app that’s about to run.
That’s a Wrap
I hope this post has helped you out.
If you're interested in my web design services or free templates, want to collaborate, or just have something to say, feel free to shoot me a message.
