Impress your clients with modern, stunning, fully customizable website templates • Ad
When I started using Framer, you couldn’t add a hover transition to a link’s underline without creating a component, or maybe using custom code.
But with recent updates, they have significantly improved the Link styles, giving us many other options.
Let’s get to it.
Add Underline Transition on Hover in Framer
Let’s say you want the underline to show by default and disappear on hover.
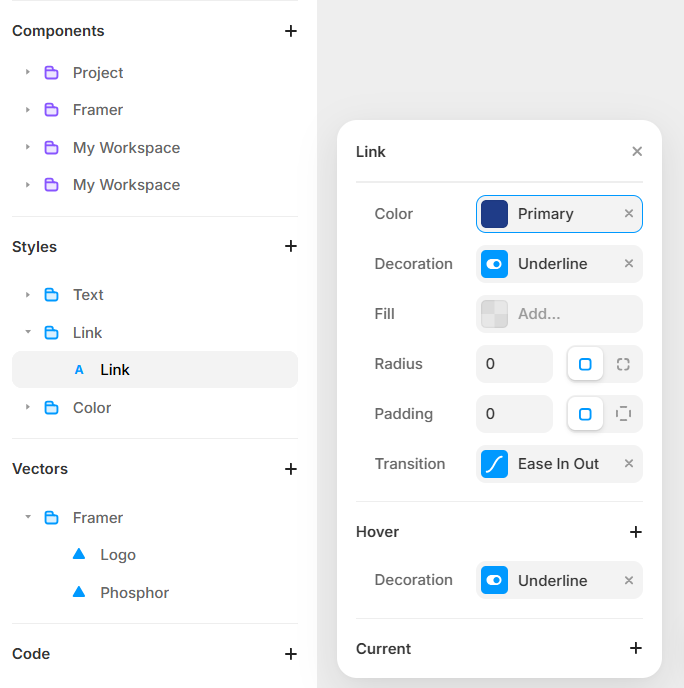
- Go to Styles > Link to create or edit a link style.
- Add a Decoration.
- Add a Transition.
- Go to Hover > Decoration > Color, pick a color, and set its Opacity to 0.
Setting the Opacity to 0 is the trick. Many remove it and expect it to transition when showing on hover, but CSS can’t do that. CSS can’t animate something that’s not there.
So, by setting the Opacity to 0, we hide it visually, but the element is still there, so its state can be animated.
If you want it the other way around – the underline to show on hover – then you set the Opacity to 0 for the default decoration, not the one on hover.
That’s a Wrap
I hope this post has helped you out.
If you're interested in my web design services or free templates, want to collaborate, or just have something to say, feel free to shoot me a message.